How to Connect Your Domain to Webflow via DNS: Step-by-Step Guide
A plain-English walkthrough of connecting a custom domain to Webflow via DNS — covering A records, CNAME records, GoDaddy delegate access, propagation, and common errors.


How to Connect Your Domain to Webflow via DNS: Step-by-Step Guide
Before You Start
This guide covers how to connect a domain you’ve already registered to a Webflow site. It’s written for the person managing the technical side of a nonprofit website launch — typically a Digital Manager, or a Communications Director who’s comfortable following step-by-step instructions.
What you need before starting:
- A registered domain (see How to Buy a Domain for Your Nonprofit if you haven’t done this yet)
- Access to your domain registrar account — either directly or via Delegate Access
- A Webflow site on a paid hosting plan (CMS Site plan or above)
- Access to Webflow as an Admin on the site
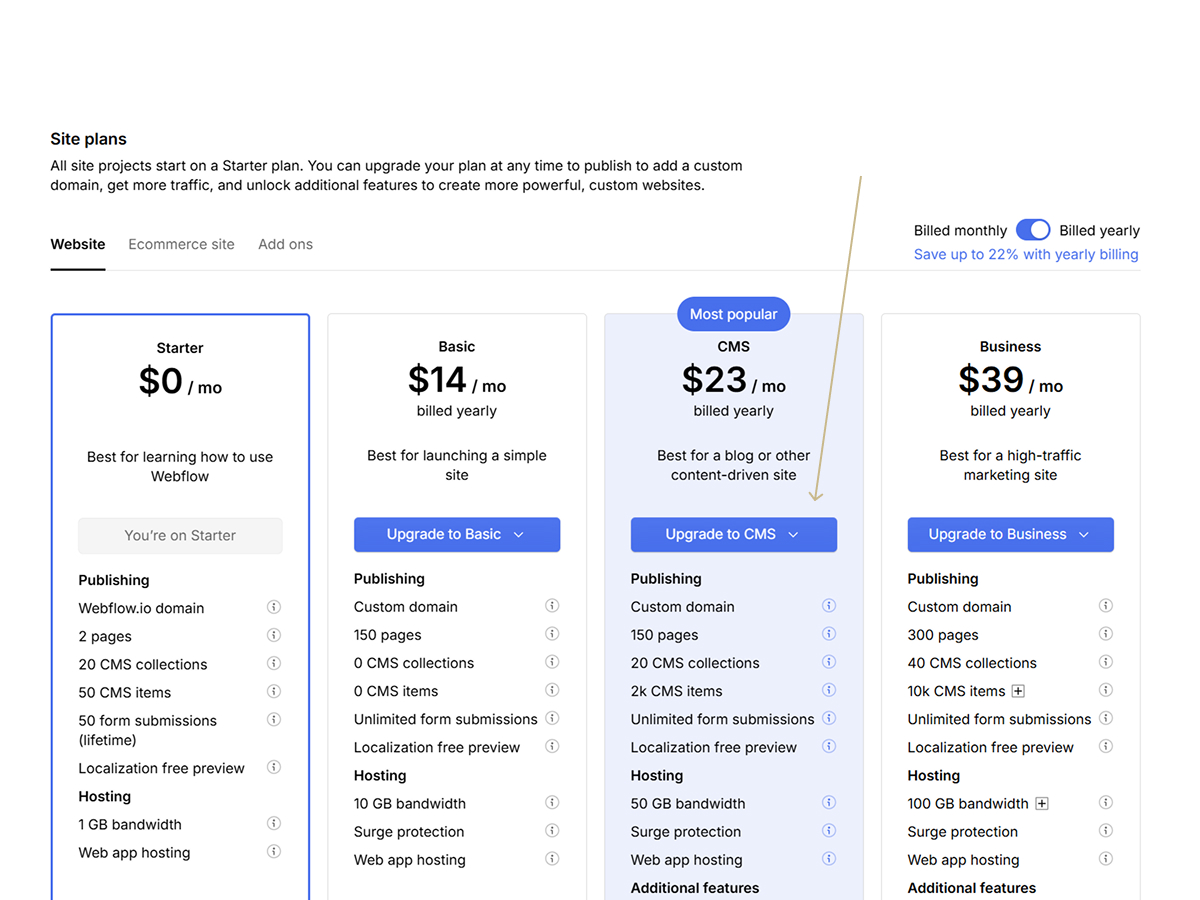
Critical prerequisite — the hosting plan must be upgraded first. A Webflow site on the free plan cannot have a custom domain connected. Before touching DNS, confirm the site is on a paid plan. Attempting to add a domain before upgrading is the most common reason this process stalls. The upgrade is done by the client directly in their Webflow account — the hosting cost is paid by the organisation to Webflow, not through the developer.
What this guide covers: Adding a custom domain in Webflow, updating DNS records at your registrar, understanding propagation, and verifying everything is working. GoDaddy is used as the primary registrar example since it’s what most nonprofit clients I work with use, but the DNS principles apply to any registrar.
What it doesn’t cover: Registering a domain (see How to Buy a Domain for Your Nonprofit), or SSL in depth (see SSL Certificates and HTTPS: What They Are and How Webflow Handles Them).
What DNS Actually Is (Without the Jargon)
DNS stands for Domain Name System. It’s the mechanism that translates a human-readable domain name — yourcharity.org.uk — into the numerical IP address that computers use to locate a server.
When someone types your domain into a browser, their computer asks a DNS server: “Where is this domain hosted?” The DNS server looks up the records associated with your domain and returns the address of the server where the site lives. The browser then connects to that server and loads the site.
When you connect a custom domain to Webflow, you’re updating those DNS records to point to Webflow’s servers. You’re telling the global DNS system: “When someone looks up yourcharity.org.uk, send them to Webflow.”
There are two types of DNS record you’ll be working with:
A record — Points a domain (or subdomain) to a specific IP address. You’ll use this for the root domain — the version without www.
CNAME record — Points a domain to another domain name rather than an IP address. You’ll use this for the www version of your domain, pointing it to Webflow’s servers.
You’ll need to set both. Most visitors type or click www.yourcharity.org.uk, but many will also try yourcharity.org.uk without the www. Both need to work and redirect to the same place.
Step 1: Upgrade Your Webflow Hosting Plan
Log into Webflow and navigate to your site’s dashboard. Look for the Workspace or site-level settings — the exact navigation label may vary as Webflow updates its interface, but you’re looking for the Hosting or Plans section associated with your specific site.
Select a paid hosting plan. For most nonprofits, the CMS Site plan is appropriate — it supports the Webflow CMS, custom domains, and the standard features a content team needs. The Business plan is needed if your site requires additional features such as user accounts, advanced form capabilities, or higher monthly form submission limits.
The upgrade takes effect immediately. Once it’s active, you can proceed to adding the custom domain.
Step 2: Add Your Custom Domain in Webflow
In Webflow, navigate to your site’s publishing settings. The exact path varies as Webflow evolves — look for a Publishing, Hosting, or Custom Domains section within your site settings.
Add your domain in two versions:
- The
wwwversion:www.yourcharity.org.uk - The root version:
yourcharity.org.uk
Webflow will display the DNS records you need to configure. Keep this screen open — you’ll be copying these values into your registrar’s DNS settings in the next step.
Webflow will show you:
- An A record value for the root domain — as of September 2025, Webflow’s IP address is
198.202.211.1. Always verify this against what Webflow displays in your site settings, as Webflow may update their infrastructure over time - A CNAME record value for the
wwwversion — this will be a Webflow domain such asproxy-ssl.webflow.com

Step 3: Access Your Domain Registrar’s DNS Settings
You now need to update the DNS records at wherever your domain is registered. The two routes for doing this in GoDaddy are delegate access and direct login.
Route A: GoDaddy Delegate Access (Recommended)
If a developer or consultant is managing DNS on your behalf, the safest approach is Delegate Access. This allows you to grant another person access to manage your domain without sharing your login credentials. Your GoDaddy account remains under your control throughout.
To grant Delegate Access in GoDaddy:
- Log into your GoDaddy account
- Navigate to Account Settings — look for your name or profile icon in the top right corner, then select Account Settings or Delegate Access from the dropdown
- Select Delegate Access from the menu
- Enter the email address of the person you’re granting access to
- Choose the level of access — for DNS management, they need at minimum the ability to manage domains
- Send the invitation
The invited person receives an email with a link to accept access. Once accepted, they can manage DNS settings on your behalf without ever seeing your password.

Route B: Direct Login
If you’re managing DNS yourself or Delegate Access isn’t practical, log into GoDaddy directly and navigate to your domain’s DNS settings:
- Log into GoDaddy
- Navigate to My Products or My Domains — look for a Domains section in the main navigation or account menu
- Find your domain in the list and select DNS or Manage DNS
- You’ll see a table of existing DNS records
Step 4: Update the DNS Records
You’re now in your registrar’s DNS management interface with Webflow’s required record values on screen. You need to add or update two records.
Setting the A Record (Root Domain)
The A record points your root domain — yourcharity.org.uk without the www — to Webflow’s IP address.
In GoDaddy’s DNS table:
- Look for an existing A record where the Host or Name field shows
@— the@symbol represents the root domain - If one exists, edit it. If not, add a new A record
- Set the Host field to
@ - Set the Points to or Value field to Webflow’s IP address — as of September 2025 this is
198.202.211.1. Verify against what Webflow displays in your site’s publishing settings, and check Webflow’s help documentation if this guide hasn’t been recently updated - Set the TTL (Time to Live) to the lowest available value — typically 600 seconds or 1 hour. A lower TTL means changes propagate faster
- Save the record
Setting the CNAME Record (www Version)
The CNAME record points the www version of your domain to Webflow’s proxy server.
In GoDaddy’s DNS table:
- Look for an existing CNAME record where the Host or Name field shows
www - If one exists, edit it. If not, add a new CNAME record
- Set the Host field to
www - Set the Points to or Value field to the Webflow CNAME value — for example
proxy-ssl.webflow.com(use the value from your Webflow settings) - Set the TTL to the lowest available value
- Save the record
A Note on Existing Records
If your domain was previously pointing to another host — a WordPress site, Wix, Squarespace, or an old Webflow build — there will be existing A and CNAME records. Update these rather than adding new ones. Having two A records for the root domain pointing to different places causes conflicts.
Delete any other A records or CNAME records for the root domain and www that aren’t the ones you’ve just set.
Step 5: Wait for DNS Propagation
Once the records are saved, DNS propagation begins. This is the process by which the updated records spread across DNS servers globally.
Propagation can take anywhere from a few minutes to 48 hours. There is no way to speed this up. It depends on the TTL value of the previous records and the update frequency of DNS servers around the world.
During propagation, some visitors may see the old site and some may see the new Webflow site. This is normal and temporary. Plan your launch for a low-traffic period if possible — early morning on a weekday, or a weekend — to minimise the number of visitors who experience inconsistency.
How to check propagation progress:
Use a DNS propagation checker — whatsmydns.net is reliable and free. Enter your domain and select the A record type. The tool shows whether servers in different global locations have picked up the new records yet. When the majority show the correct IP address, propagation is substantially complete for most visitors.
Step 6: Verify in Webflow
Once DNS has propagated, return to your Webflow publishing settings. Webflow checks DNS records automatically and will indicate whether the domain is connected correctly.
A successfully connected domain will show a confirmed or verified status in Webflow’s custom domain settings. If the domain shows as unverified after 48 hours, there is likely a DNS configuration error — see the troubleshooting section below.
Step 7: SSL Provisions Automatically
Once the domain is connected, Webflow provisions an SSL certificate automatically via Let’s Encrypt. This is what enables HTTPS — the secure version of your domain — and the padlock icon that appears in browsers.
SSL provisioning typically completes within a few minutes of DNS being fully propagated. You don’t need to do anything to trigger it — Webflow handles it entirely.
Until SSL is provisioned, visitors may see a security warning in their browser. This resolves on its own. Do not attempt to install a separate SSL certificate — Webflow’s automatic provisioning handles this correctly and manual certificates will conflict with it.
For a full explanation of what SSL is and why it matters for nonprofit websites, see SSL Certificates and HTTPS: What They Are and How Webflow Handles Them.
Common Problems and How to Fix Them
The domain shows as unverified in Webflow after 24 hours
Check the DNS records at your registrar again. The most common causes are:
- The A record Host field is set to the full domain name (
yourcharity.org.uk) instead of@ - The CNAME value was typed incorrectly — copy and paste from Webflow rather than typing manually
- A conflicting A record from the previous host is still present alongside the new one
- The hosting plan wasn’t upgraded before the domain was added — check that the site is on a paid plan
The site loads on www.yourcharity.org.uk but not on yourcharity.org.uk (or vice versa)
One of the two records is misconfigured or hasn’t propagated yet. Check both records independently using whatsmydns.net. Whichever version isn’t resolving correctly — root domain or www — has a problem with its specific record.
A security warning appears after the domain connects
SSL is still provisioning. Wait 30 minutes and check again. If the warning persists after several hours and Webflow shows the domain as connected, contact Webflow support — occasional SSL provisioning failures do occur and require Webflow to intervene.
The old site still appears after 48 hours
Clear your browser cache and check in an incognito window. Browser caching can cause the old site to persist locally even after DNS has propagated. If an incognito window also shows the old site, propagation may not be complete to your specific location — check whatsmydns.net for your region.
A Note for Communications Directors
If you’re not the person configuring DNS but you need to understand what’s happening during this process, here’s the short version.
Before launch, someone needs to update settings at the company where your domain is registered — GoDaddy, Namecheap, or similar — to tell the internet that your domain now lives on Webflow’s servers. This involves changing two technical settings called DNS records. It takes about ten minutes to configure and then up to 48 hours to take effect globally.
The most important thing you can do is ensure that access to the domain registrar account is available when it’s needed. If the domain is in an account you manage, the simplest approach is to use GoDaddy’s Delegate Access feature to grant your developer access without sharing your password. If you’re unsure who owns the domain or how to access the registrar account, this is worth resolving well before launch day — not on the morning you intend to go live.
Next Steps
Once the domain is connected and SSL is confirmed, your site is live. The remaining pre-launch steps — verifying analytics, testing forms, confirming redirects — are covered in the complete pre-launch checklist.
Eric Phung has 7 years of Webflow development experience, having built 100+ websites across industries including SaaS, e-commerce, professional services, and nonprofits. He specialises in nonprofit website migrations using the Lumos accessibility framework (v2.2.0+) with a focus on editorial independence and WCAG AA compliance. Current clients include WHO Foundation, Do Good Daniels Family Foundation, and Territorio de Zaguates. Based in Manchester, UK, Eric focuses exclusively on helping established nonprofits migrate from WordPress and Wix to maintainable Webflow infrastructure.
Not sure where your site currently stands?
A Blueprint Audit tells you exactly what needs to change — and why.
Before implementing anything new, it's worth knowing what your current site is and isn't doing for your stakeholders. The Blueprint Audit gives you that clarity in two to three weeks.
Related Resources
How to Connect Your Domain to Webflow via DNS: Step-by-Step Guide
A plain-English walkthrough of connecting a custom domain to Webflow via DNS — covering A records, CNAME records, GoDaddy delegate access, propagation, and common errors.
Join our newsletter
Subscribe to my newsletter to receive latest news & updates